How To Build A 3D Animal Cell Model
The flat images in most science textbooks are of little use when it comes to the tricky process of learning the parts of an animal cell. A hands-on 3D model is a much better way to illustrate the inner workings of life's basic building blocks. Try making this homemade version for your next biology class or science fair project.
How to Build a 3D Animal Cell Model
Step 1
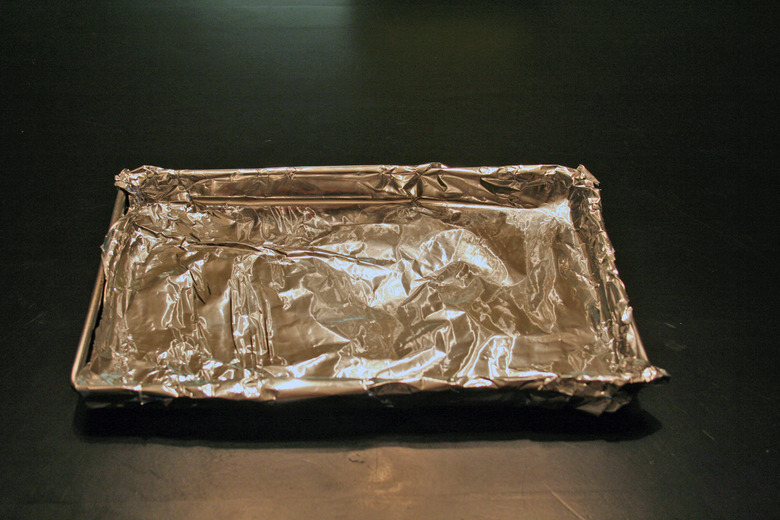
Cover a small baking sheet with aluminum foil.
Step 2
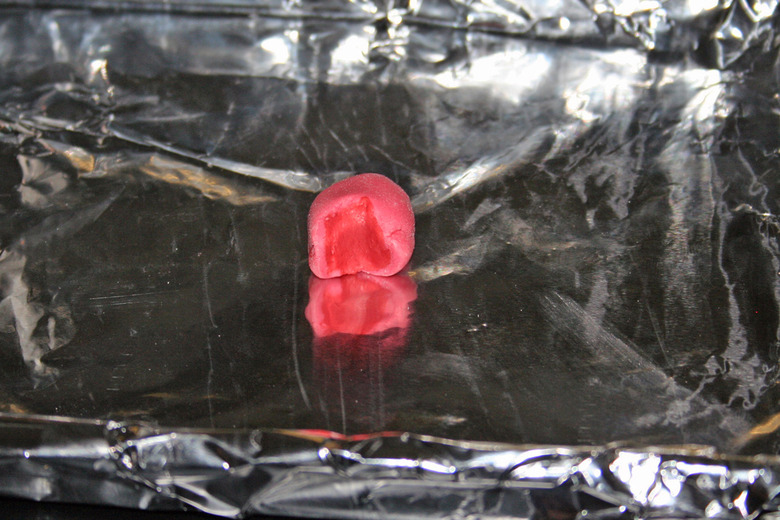
Create the cell's nucleolus by rolling red polymer clay into a ball with a 1/2-inch diameter. Cover the nucleolus with a 1/8-inch layer of pink polymer clay. Cut a wedge out of the ball and place it on the baking sheet.
Step 3
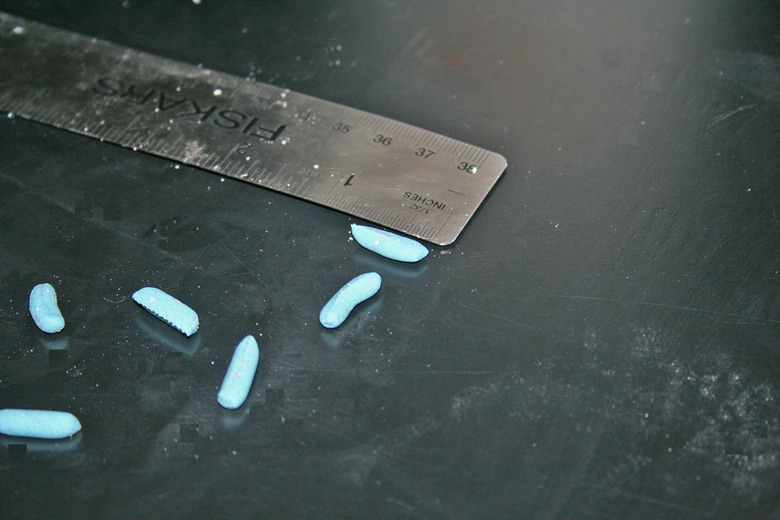
For the mitochondria, roll blue polymer clay into a 1/4 –inch thick cylinder. Cut three 1/2–inch pieces from the cylinder with the clay knife. Round the edges off, then cut the pieces in half. Scribe a zigzag pattern into the flat faces of the sections and place them on the baking sheet.
Step 4

Make the vacuoles by rolling the white polymer clay into three, 1/4–inch balls. Distort the balls by squishing them with your fingers, and then place them on the baking sheet.
Step 5
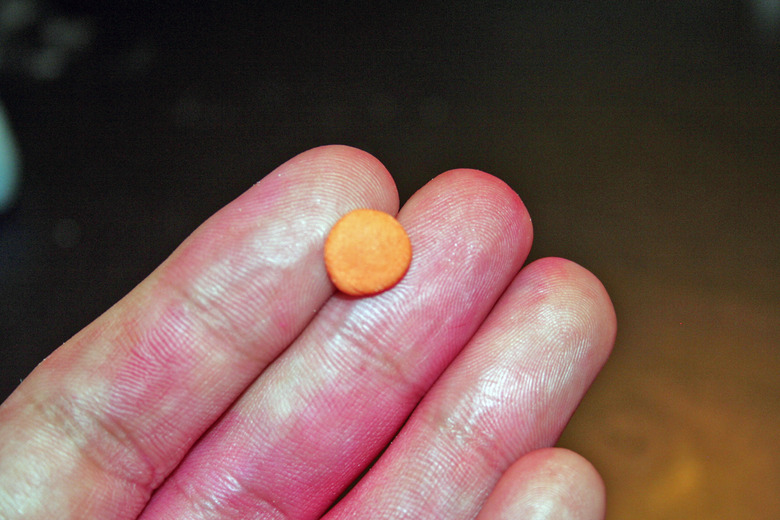
Repeat step 4 with the orange clay to create the lysosomes.
Step 6
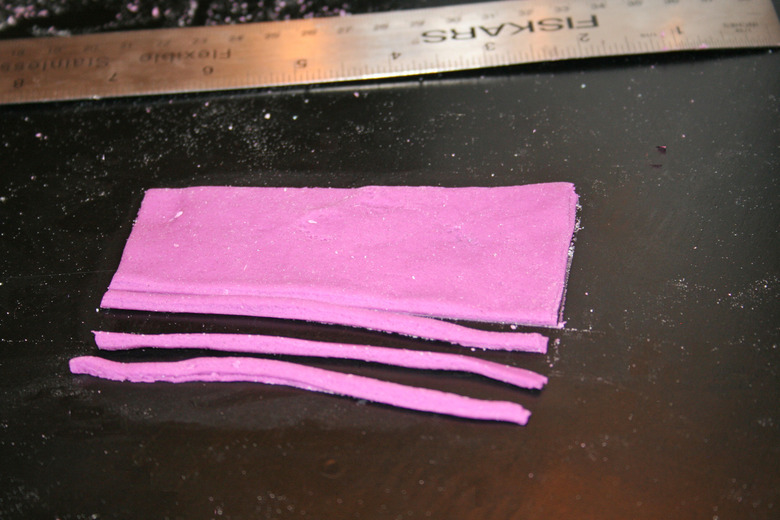
With the rolling pin, flatten the purple polymer clay into a 1/8-inch sheet. Cut three 3/8-inch by 4-inch strips from the clay. Starting on one of the 3/8-inch ends of a strip, accordion fold the clay in an irregular pattern until it resembles the Golgi body of a cell. Repeat this procedure with the other two clay strips, then set all three Golgi bodies on the baking sheet.
Step 7
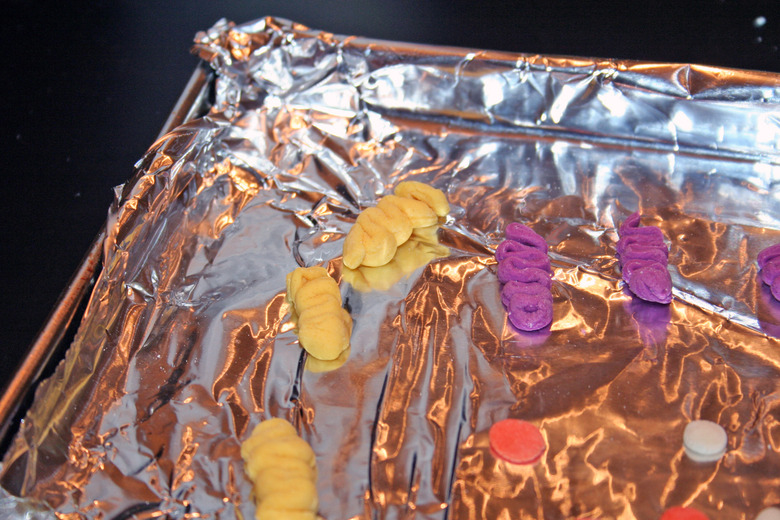
Fashion the endoplasmic reticulum out of yellow polymer clay using the process described in step 6.
Step 8
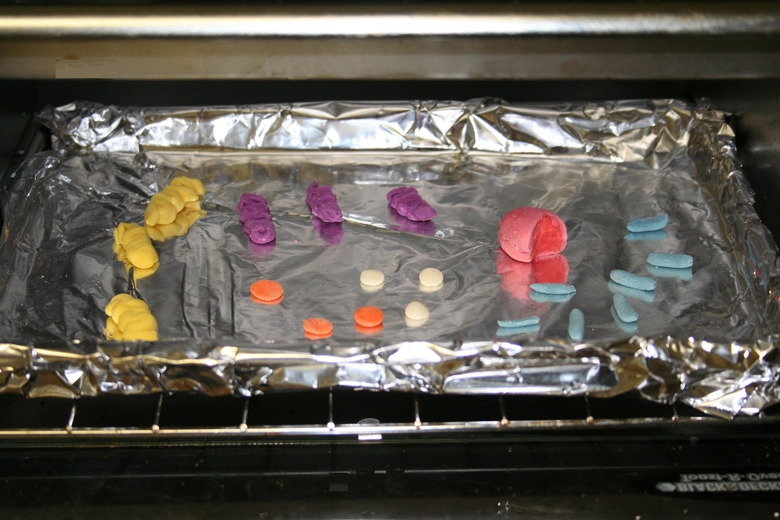
Place the baking sheet in the toaster oven and bake at 275 degrees Fahrenheit for 20 minutes.
Step 9
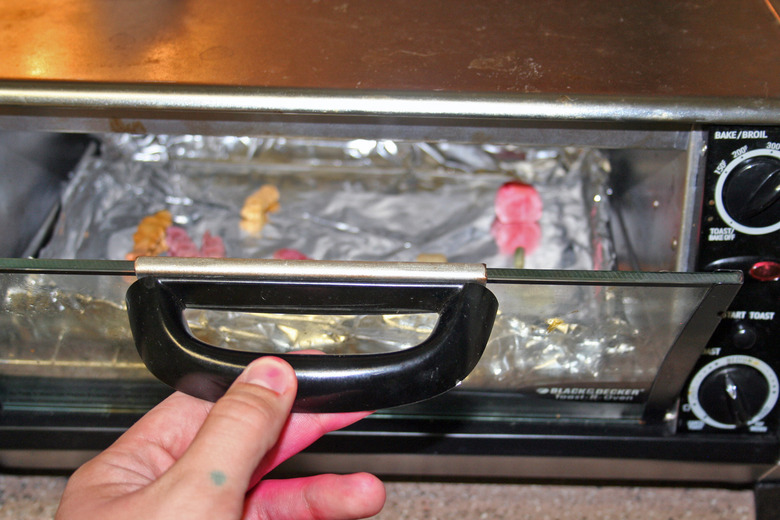
Crack the door of the toaster oven to allow the polymer clay to cool for an hour. When the clay organelles reach room temperature, remove them from the oven and apply a thin coat of clear nail polish to each piece. Allow the nail polish to dry for 45 minutes.
Step 10
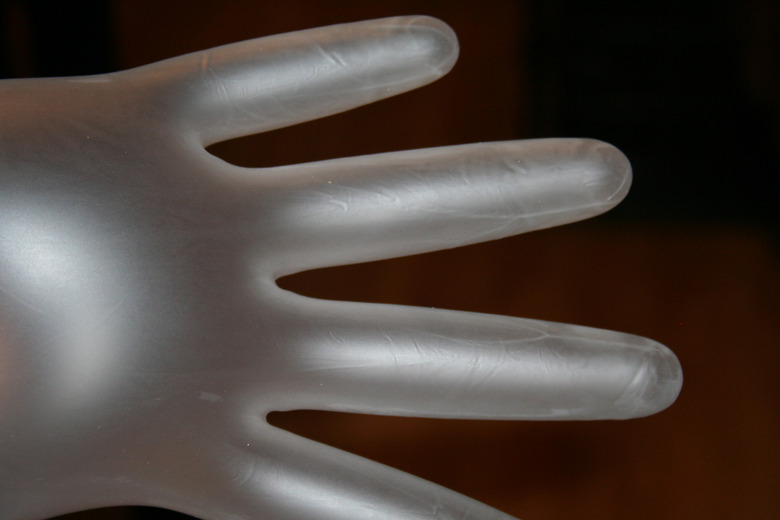
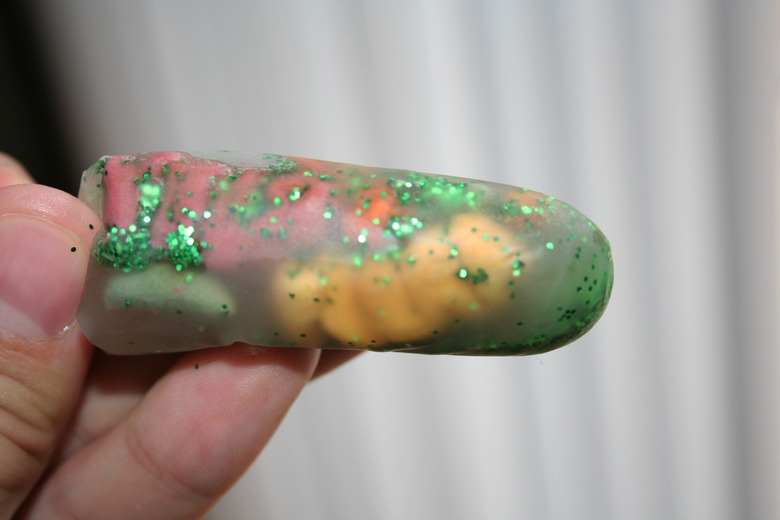
Inflate a rubber exam glove and release the air. Repeat this process four more times to stretch the glove. Cut off one finger of the glove. This will represent the cell membrane.
Step 11
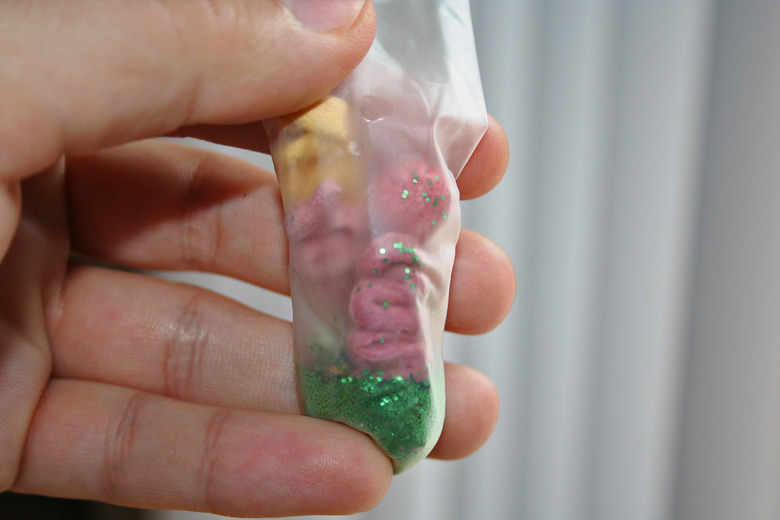
Place all of the clay organelles and one teaspoon of glitter, which will represent the ribosomes, in the finger of the glove.
Step 12
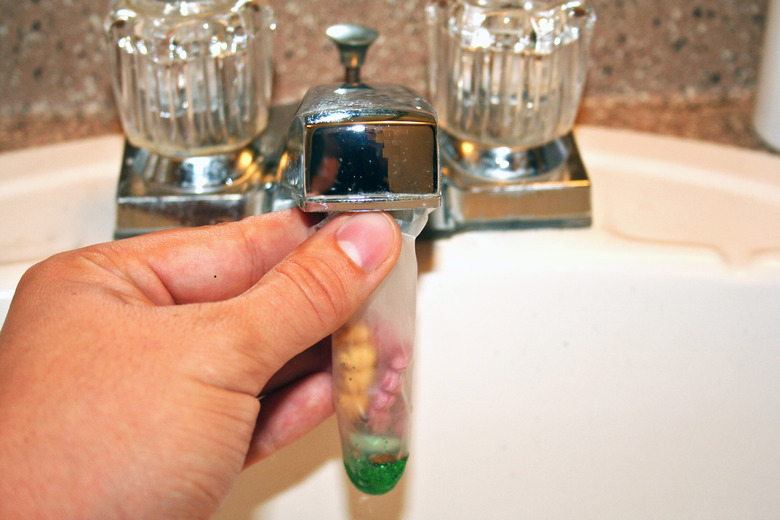
Stretch the open end of the glove finger over the spout of a water faucet and fill with cool water. Turn off the water and carefully remove it from the faucet. Tie it off as you would tie a balloon. Shake and gently squeeze to make the organelles move.
Step 13
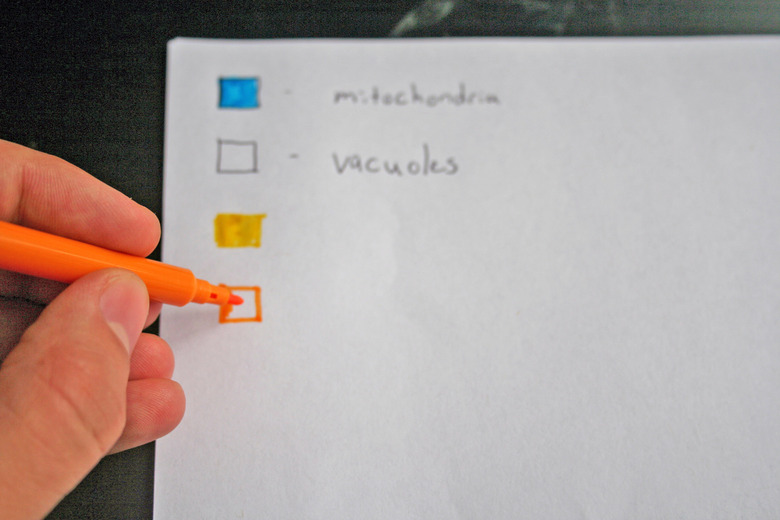
Use the colored markers to create a color-coded key on a piece of 10-inch by 10-inch white poster board. Cut out a small piece of the leftover rubber glove and glue it to the key to represent the cell membrane. Draw a box without color to show that the water represents the cytoplasm. Display the cell model knot-side down in a plastic spray can lid next to the poster board key.
Things Needed
- Small baking sheet
- Aluminum foil
- Red, pink, blue, white, orange, purple and yellow oven-hardening polymer clay
- Green glitter
- Clear nail polish
- Rolling pin
- Clay knife
- Toaster oven
- Light-colored latex exam glove
- Scissors
- Plastic lid from a can of spray paint
- White glue
- Water faucet
- 10-inch by 10-inch white poster board
- Colored markers
TL;DR (Too Long; Didn't Read)
Create a cell that glows under a black light by adding a tablespoon of liquid laundry detergent to the glove finger before filling with water.
For an unforgettable biology lesson, teachers can try this fun "cellular" game: Prepare 20-30 cell models in advance. Have your class meet outside and throw them at an exterior wall. Assign a point value to each organelle, and have the students collect them. The person with the most points at the end of the game wins.
Warning
Step 11 can get very wet. Keep a towel handy just in case.
Use a nitrate exam glove if you are allergic to latex.
References
Cite This Article
MLA
Flocke, Amanda. "How To Build A 3D Animal Cell Model" sciencing.com, https://www.sciencing.com/build-3d-animal-cell-model-6110098/. 24 April 2017.
APA
Flocke, Amanda. (2017, April 24). How To Build A 3D Animal Cell Model. sciencing.com. Retrieved from https://www.sciencing.com/build-3d-animal-cell-model-6110098/
Chicago
Flocke, Amanda. How To Build A 3D Animal Cell Model last modified August 30, 2022. https://www.sciencing.com/build-3d-animal-cell-model-6110098/