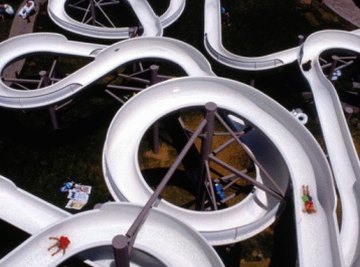

School projects stretch the imagination. Basic physics questions are posed to students from grade school through college. One such project is making a model of a water slide. The first concept that must be attained is thinking outside of the box to come up with a common household item that is capable of becoming a water slide. One possibility is a piece of fabric. No particular type of fabric is required but it must be four inches wide and approximately 24 inches long. A can of spray starch, straws and clay round out the main items required to make a model water slide.
- 4-inch by 24-inch piece of fabric
- Vacuum cleaner hose
- Heavy duty spray starch
- 14-inch by 14-inch piece of corrugated cardboard
- Self-hardening clay
- Drinking straws
- Tape
- Ruler
- Scissors
- Glue gun
- Low temp glue sticks
Paint the cardboard base with tempera or acrylic paint to add more character to the water slide model.
Position a vacuum cleaner hose on a flat surface to look like a flattened out water slide. Make sure the vacuum cleaner hose is on a surface that is cleaned easily, such as a linoleum or concrete floor. There is no absolute shape to make the water slide. It varies entirely based on the desires of the person making the model.
Drape the 4-inch by 24-inch piece of fabric over the vacuum cleaner hose. Position the fabric so the four inch width lays from one side to the other on the vacuum cleaner hose. The length of the fabric extends along the curve of the hose to create the length of the water slide. Center the middle of the four inch width so approximately half of it is on either side of the hose.
Shake a can of heavy duty spray starch for 30 seconds. Hold the nozzle approximately 12 inches from the surface of the fabric. Spray a thin layer of starch over the fabric. Allow the starch to dry for five minutes. Repeat the process for a total of five layers of spray starch. Allow the final layer to dry for 15 minutes.
Carefully pick up the piece of starched fabric to make sure the curve stays when removed from the vacuum cleaner hose. If not, return the fabric to the hose and spray two to three more layers over the fabric in the areas where it is droopy.
Position two 10-inch drinking straws on a vertical axis. Separate the drinking straws by two inches. Make sure the top and bottom of the drinking straws are even. Cut two five-inch pieces of tape. Place one piece of tape at a time between the two drinking straws. Place the first piece one inch from the top of the two drinking straws. Push the tape so it sticks to the straws. Flip the straws over continuing to wrap the tape. The tape will hold the drinking straws apart by two inches making a perfect set of legs for the water slide. Repeat the process one inch from the bottom of the two straws.
Cut two drinking straws so they are nine inches long, eight inches long, seven inches long, six inches long, four inches long, three inches long, two inches long and one inch long. Position two lengths of straws the same length on a vertical axis. Separate the two straws by two inches. Make sure the top and bottom edge of the straws are even. Tape the straws together using Step 5 instructions to create a set of legs to hold up the water slide.
Place the 14-inch by 14-inch piece of corrugated cardboard on a flat work surface. Determine the position of the two tallest legs for the model water slide. Hold the curved piece of fabric over the cardboard and decide where the tallest end will be. Roll two 1-inch balls of self-hardening clay. Stick the clay to the cardboard where the determined first set of legs will be placed. Stick the 10-inch legs in the clay. Repeat the process with the remaining sets of legs going from tallest to shortest.
Rest the curve of the fabric between the sets of legs. Reposition the legs as needed so the water slide rests comfortably on the base. Cut off any excess fabric to create the desired length of water slide.
Glue the fabric to the drinking straw legs using low temperature glue sticks. Squeeze a drop of glue where the fabric and drinking straws meet. Squeeze a drop of low temperature glue at the base of each drinking straw to ensure they do not fall out of the self-hardening clay.
Things You'll Need
Tips
About the Author
Kim Blakesley is a home remodeling business owner, former art/business teacher and school principal. She began her writing and photography career in 2008. Blakesley's education, fine arts, remodeling, green living, and arts and crafts articles have appeared on numerous websites, including DeWalt Tools, as well as in "Farm Journal" and "Pro Farmer."
Photo Credits
NA/Photos.com/Getty Images