Microscopes allow people to look at objects that are too small to be seen by just the human eye. Scientists use microscopes to collect data for experiments or to examine samples, which are sometimes called specimens. The field of microscopy studies living things, molecules, minerals, and even individual atoms. Understanding the parts of a microscope helps scientists and explorers the examine the world and communicate their findings.
There are many types of microscopes that work off of different scientific principles with different components and parts. This introduction will focus on classic compound microscopes that are common in high schools, laboratories, and institutions around the world. Simple microscopes work with similar principles of optical magnification (bending the light we can see to make things appear bigger), but they only have one lens. Stereo microscopes are types of compound microscopes that have two eye pieces to create a binocular-like system; they often have nosepieces between the eyepiece tubes. Other types of microscopes to be aware of include electron microscopes (which examine extremely tiny objects using electrons instead of light) and atomic force microscopes (which measure other properties like height, conductivity, and strength). There are many other sub-types of microscopes like Abbe Condensers, which use a condenser lens to achieve very high magnifications of over 1000x.
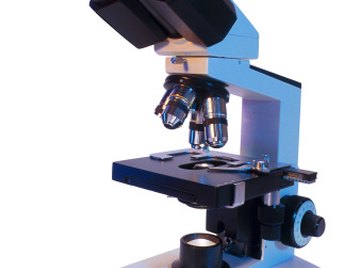
Looking Through the Eyepiece
At the top of the microscope are one or two tubes containing lenses; this is called the eyepiece. This is the part of the microscope scientists look through to see their specimen. The ocular lens inside the eyepiece usually magnifies the specimen to 10 times its actual size (10x power).
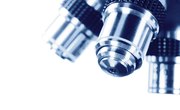
The eyepiece lens connects to a tube, at the end of which is another set of lenses called objective lenses. These lenses magnify the specimen further. When combined, and ocular lens with 10x power and an objective lens with a power of 40x magnifies the specimen to a total magnification of 400 times its original size.
Looking at the Specimen
Scientists usually look at specimens mounted on pieces of glass called a microscope slide (which are often plastic or glass slides). The slides are clipped onto a flat area called the microscope stage that is beneath the objective lenses (the clips are also usually called stage clips). Under the stage is a light source that shines upward and illuminates the specimen. Microscope slides often have a cover slip that goes over the preserved specimen to protect the sample.
Between the stage and the light is the aperture, which is a hole that can be made larger or smaller to let in more or less light, and the diaphragm, which directs light through the aperture. Together, these components regulate the amount of light microscopes let through to the rest of the stages.
Changing the View
The side of the microscope has two adjustment knobs that change the focus of the lenses so the specimen's image looks sharper in the eyepiece. These knobs control the mechanical stage of the microscope. The larger knob is the coarse focus, which moves the stage up and down, and brings the image of the specimen in or out of focus. After the specimen is brought into the best focus possible using the coarse adjustment, the fine focus – the smaller knob – is used to fine-tune the image and make fine adjustments to the image.
Different magnification levels and different objective lenses will require different adjustment and calibration to align the lenses properly. Generally, higher magnifications (high power lenses) would need to be closer to the specimen, and lower magnifications (low power lenses) would need to be farther from the specimen.
Putting It All Together
The bottom of the microscope is called the base, and the illuminator light is located on top of the base of the microscope. An arm projects up from the back of the microscope's base. The focusing knobs are located toward the bottom of this arm, and the stage -- which is where the aperture, diaphragm and specimen are -- extends over the base from the arm. The eyepiece and objective lenses are located at the top of the arm over the stage and base. The arm acts as the microscope's handle. A microscope should be picked up by its arm, with your other hand supporting the base.
Use the power of microscopes we can study the multitude of extremely small objects that make up the world around us.
References
About the Author
Ellie Gambrel lives in Raleigh, N.C., where she has worked as an editorial assistant since 2007. She holds a Bachelor of Science in biology and a Bachelor of Arts in English from a private liberal arts college for women.
Photo Credits
Comstock/Comstock/Getty Images