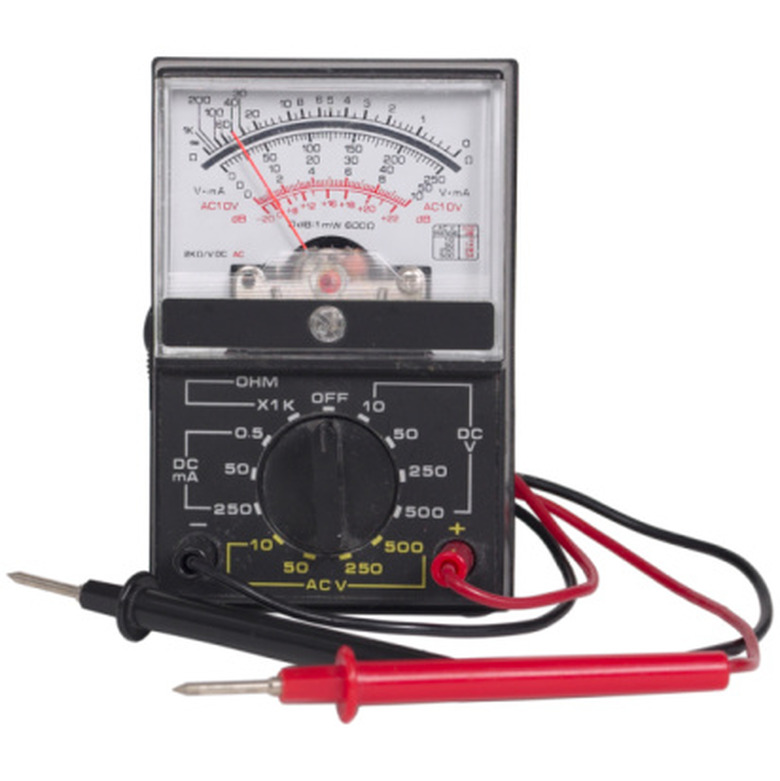
How To Use Analog Multimeters
Analog multimeters are those that have a moving needle that stops on a number that is printed on the background behind the moving needle. The number that the needle stops on indicates the volts, ohms or amps the the meter is measuring depending on how the control knob is set. Analog multimeters are cheaper than digital multimeters but not as robust or simple to use. Analog multimeters are preferred by some technicians because the movement of the needle can show you some things that are not so obvious with digital multimeters.
Step 1
Put the meter in the circuit to measure amps. This means cutting, or disconnecting, a wire and making the meter part of the circuit. Current must be flowing through the meter for the meter to function. Amps are a measure of how many electrons are flowing past a point in a second. The ohms are often marked on components and amps are simple to compute from a voltage reading using Ohm's law which says that amps = volts/ohms.
Step 2
Measure volts by touching the two meter probes to the points you want to measure. Volts are a measure of how much pressure is pushing the electrons that are flowing. If you put both probes in the same place it will register zero volts because there is no pressure difference. If you put the two probes on the terminals of a 9 volt battery it will measure approximately 9 volts (depending on how new the battery is). If you put the two probes on the two leads to a component, it will tell you how much of the pressure goes into pushing electrons through that particular component.
Step 3
Turn off the power and disconnect a component from the circuit before measuring its resistance. The meter has a battery in it, and when you are measuring resistance a small current (under a known voltage) is sent through the leads into the component. Ohms law is used to compute the resistance: ohms = volts/amps.
TL;DR (Too Long; Didn't Read)
Whatever you are measuring, set the control knob to the largest scale first, and lower it until you get a proper reading. For example, if you are measuring volts, the control knob to read hundreds of volts first. When the needle does not move, click the control knob down one step to measure tens of volts, and when this shows no results click down one more step. If you do this habitually, you will never overload the meter and your meter will last a lot longer.
Warning
The resistance readings will not be correct unless you "zero adjust" the meter before each reading. Hold the leads together with the left hand while turning the zero adjust knob until the needle points to zero.
Cite This Article
MLA
Mano, Carlos. "How To Use Analog Multimeters" sciencing.com, https://www.sciencing.com/use-analog-multimeters-8297477/. 24 April 2017.
APA
Mano, Carlos. (2017, April 24). How To Use Analog Multimeters. sciencing.com. Retrieved from https://www.sciencing.com/use-analog-multimeters-8297477/
Chicago
Mano, Carlos. How To Use Analog Multimeters last modified March 24, 2022. https://www.sciencing.com/use-analog-multimeters-8297477/
