Build A Model Of Jupiter
Jupiter is the largest planet in our solar system and has 60 moons that we know of so far. Since many of Jupiter's satellites are so small in comparison to the planet, most models display only the four largest moons: Io, Europa, Ganymede and Calisto. These are known as the Galilean moons. Making a model of Jupiter is a creative, three-dimensional way to demonstrate the size correlations between the planet and its moons while also displaying some of the planet's most unique features.
Step 1
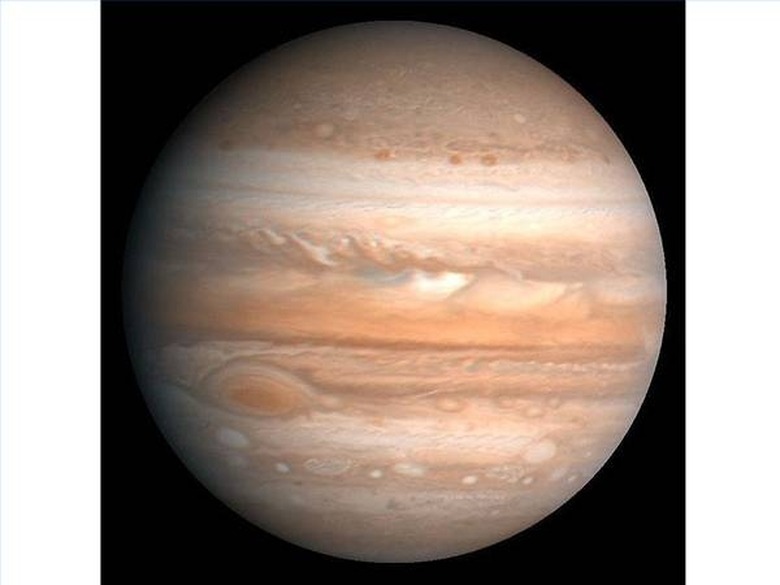
Paint your 12-inch polystyrene ball with craft paint in the colors of white, various shades of brown and orange. Lighten the brown and orange paints with white paint so the shades vary. Don't forget to make the red swirl, Jupiter's famous storm, on the lower portion of the planet. Refer to a space photo of Jupiter to get the coloring correct. Paint the top half of the sphere first. Allow it to dry. Then turn it over to paint the bottom half. This will prevent smearing.
Step 2
Paint the 2-inch diameter polystyrene ball to look like Io with yellow and brown mottled paint. Paint the 1-inch diameter balls to look like Europa and Ganymede, mottled brown and grayish colors. Paint the smallest ball to resemble Calisto, a dark mottled brown and gray.
Step 3
Cut the wire into the following sizes: one 4-inch length, one 5-inch length, one 6-inch length, one 8-inch length and three 12-inch lengths. Bend the three 12-inch lengths of wire in the middle to form an L-shape with a gentle curve. Try to make each one even.
Step 4
In the center of the cardboard square, use a cup to draw a perfect circle. Divide the circle evenly into three sections, like a pie. On the circle, poke holes into the cardboard with the pencil at the "thirds" marks.
Step 5
Feed the L-shaped wires through the bottom of the cardboard. Use duct tape to secure the bottom parts flat underneath the square. When you turn the square over, face-up, you'll have three wires sticking straight up. Paint the top of the square black, to represent space. Allow it to dry.
Step 6
Center and press your Jupiter sphere onto the three wires, sinking it in approximately three or four inches. Try to do this once, as you will weaken the polystyrene by moving the wire in and out of it. This will make your planet stand up.
Step 7
Push one end of the 4-inch length of wire into your Io moon. Push one end of the 5-inch wire into your Europa moon. Push one end of the 6-inch wire into your Ganymede moon. And push the end of the 8-inch wire into your Calisto moon. Push the other ends of the wires into your model of Jupiter so that the planets are spaced out around it. Refer to a visual image of Jupiter and its satellites to help you decide your placement.
Things Needed
- 12-inch diameter polystyrene ball
- 2-inch diameter polystyrene ball
- 2 1-inch diameter polystyrene balls
- 1/2-inch diameter polystyrene ball
- Craft paint
- Craft paint brushes
- 12-inch square heavy cardboard
- Thin wire, such as floral wire
- Cup
- Pencil
- Duct tape
TL;DR (Too Long; Didn't Read)
Make your model planet rotate by using a working record player as the base. Cover the components of the player with black felt so that it is not obvious what it is.
Create factoids about the planet and its features on strips of sticker paper. Attach the factoids to toothpicks or pieces of wire and stick them around the model. Factoids might include the makeup of the planet's gases or the size of the red spot in relation to Earth.
Cite This Article
MLA
Wright, Mackenzie. "Build A Model Of Jupiter" sciencing.com, https://www.sciencing.com/build-model-jupiter-4829539/. 24 April 2017.
APA
Wright, Mackenzie. (2017, April 24). Build A Model Of Jupiter. sciencing.com. Retrieved from https://www.sciencing.com/build-model-jupiter-4829539/
Chicago
Wright, Mackenzie. Build A Model Of Jupiter last modified March 24, 2022. https://www.sciencing.com/build-model-jupiter-4829539/
