How To Build A Space Station Science Project
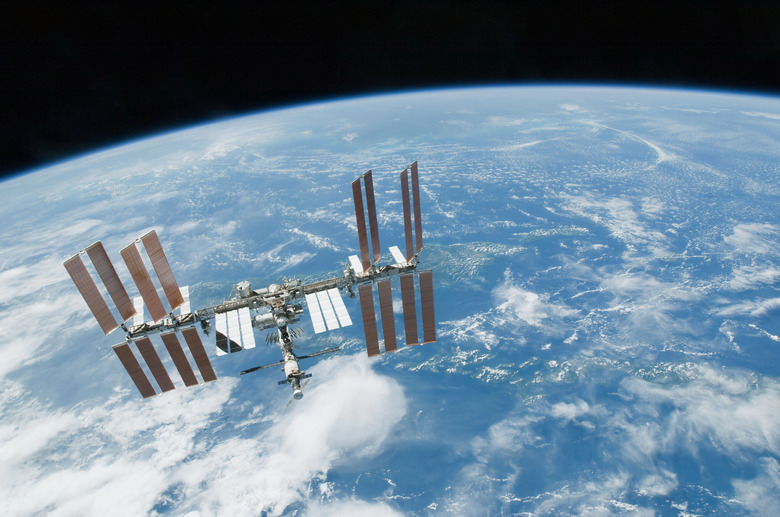
The International Space Station was built through the combined efforts of the United States, Russia, Canada, Europe and Japan. The Russian-built Zarya control module was launched from Baikonur Casmodrome in Kazakstan November 20, 1998. It was followed by the U.S.-built Unity connection module launched from the Kennedy Space Center in Florida on December 4, 1998. Building a model of the International Space Station makes a great visual for a science project.
How to Build a Space Station Science Project
Step 1
Bundle six bamboo sticks together. Using the high-strength packing tape, tape the middle of the bundle of bamboo sticks together.
Step 2
Wrap the bundle of sticks with one continuous length of wrapping tape starting at one end and wrapping to the opposite end. Keep the bundle tight; it will need to fit into the drinking straw.
Step 3
Push the large drinking straw over the bundle covering the tape until the straw is directly in the middle of the bundle of sticks. This is the integrated truss assembly component.
Step 4
Measure 1/4 inch from the end of the bamboo bundle and mark with an X. Repeat on the other end of the bundle.
Step 5
Measure 1 inch from the X and mark the bundle with a second X. Repeat on the other end making a total of four Xs.
Step 6
Glue four bamboo sticks together in a bundle using the hot glue gun. Repeat until there are a total of four bamboo stick bundles.
Step 7
Glue one bundle of bamboo sticks on each of the four X marks using the hot glue gun. These will be the frames for attaching the PV Array Panels.
Step 8
Measure eight 2" by 9" rectangles on the foam meat trays. Cut out the rectangles. These are the PV Array Panels.
Step 9
Run a line of glue from the middle of the PV Array Panel support to the end with the hot glue gun. Place one of the PV Array Panels on the line of glue with the "waffled" side up. Repeat until all eight panels are glued to the supports.
Step 10
Lay the model on a flat surface with the PV Array Panel side down.
Step 11
Cut a 6 inch piece of pipe foam insulation.
Step 12
Cut a hole in the middle of the toilet paper tube. Insert the piece of pipe foam inside the hole. Glue with the epoxy glue to stabilize.
Step 13
Run a line of glue around the rim of the 35mm film canister. Glue on top of the T joint of the toilet paper tube and foam insulator.
Step 14
Cut a 2 1/2 inch piece of pipe foam insulation.
Step 15
Insert the second drinking straw inside the hole in the pipe foam insulation opposite of the T joint.
Step 16
Slide the 2 1/2 inch pipe foam insulation onto the drinking straw leaving 1/2 inch of straw showing.
Step 17
Run a line of glue around the rim of the film canister cap. Attach the cap to the end of the toilet paper tube, capping the hole. Repeat on the opposite end of the toilet paper tube and the end of the 2 1/2 inch pipe foam insulation so all holes are capped. This is the "module" part of the space station.
Step 18
Place a large drop of hot glue in the middle of the straw of the integrated truss assembly component. Attach the module to the integrated truss assembly component with the film canister and PV Array Panels both pointing down.
Step 19
Decorate as desired (optional).
Step 20
Allow to dry for at least 24 hours. Use the epoxy glue to bond areas that are weak.
Step 21
Attach to ceiling with fishing line for display.
Things Needed
- 18 bamboo skewers
- 2 large drinking straws
- 8 foam meat trays, one side should be "waffled"
- Pipe foam insulation
- Empty toilet paper tube
- 3 black or gray 35mm film canister caps
- 1 35mm film canister
- High-strength packing tape
- Nylon fishing line
- Hot glue gun
- Epoxy glue
- Ruler
- Pen
- Scissors or Xacto knife
TL;DR (Too Long; Didn't Read)
Look at pictures of the International Space Station for decorating ideas.
Warning
Adult supervision is recommended when cutting and using hot glue.
Never put hot glue directly on pipe foam tubing; it will melt the tubing if applied directly.
Cite This Article
MLA
Hobbs, Jamie. "How To Build A Space Station Science Project" sciencing.com, https://www.sciencing.com/build-space-station-science-project-5692948/. 27 November 2009.
APA
Hobbs, Jamie. (2009, November 27). How To Build A Space Station Science Project. sciencing.com. Retrieved from https://www.sciencing.com/build-space-station-science-project-5692948/
Chicago
Hobbs, Jamie. How To Build A Space Station Science Project last modified August 30, 2022. https://www.sciencing.com/build-space-station-science-project-5692948/