How To Create A Lemon Battery Science Project To Power A Calculator
Creating a lemon battery science experiment is a great way for kids to learn about electricity. It is also very fun. The process is simple and inexpensive. A battery is a simple mechanism that consists of two metals in acid. The zinc and copper of the nail and copper hooks become the battery's electrodes, while the juice of the lemon serves wonderfully as the acidic conductor needed to help these two metals work together, thus creating power. The negatively charged electrons flow through the nail to the calculator, providing the power to make the calculator work. They then flow through the copper wire back to the positively charged hook to create an electronic circuit. The acidic lemon juice serves as the conductor that allows the electrons to flow in this way. This guide will show you how you can create a lemon battery science experiment.
Step 1
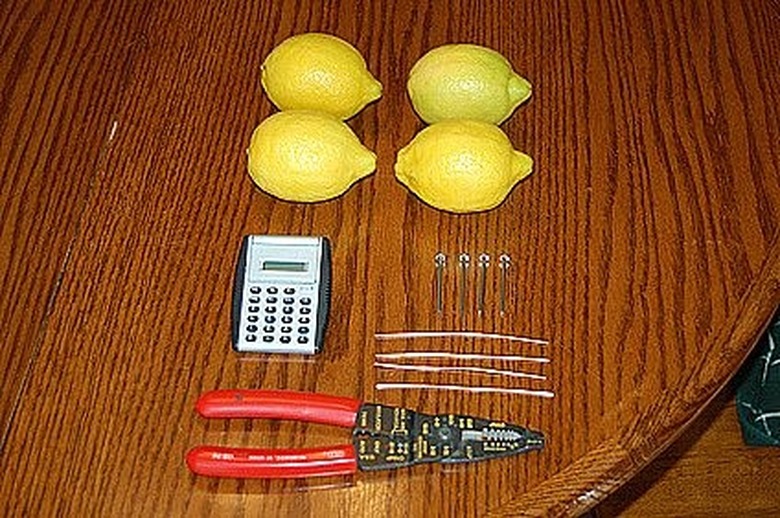
Lay out your supplies. Get your supplies together and lay them out. Explain to the kids what each item is and what purpose it serves. Have a pair of wire cutters handy for making the correct lengths of copper wire to make all the connections. Cut a 3-4 inch length of copper wire and curve one end to create a hook. A galvanized nail is coated in zinc and makes it ideal for the lemon battery science experiment.
Step 2
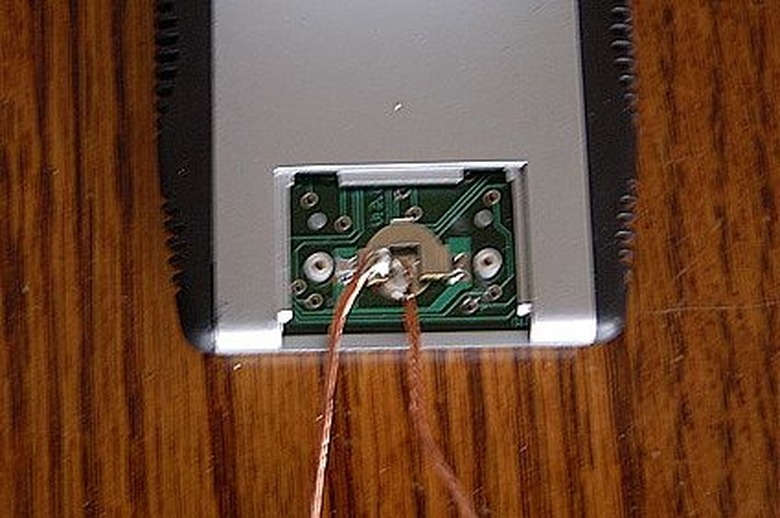
Remove the battery from the old calculator. Take the battery out of the old calculator. Attach one end of two copper wires about 6 inches long to the battery compartment of the calculator. It does not matter how the wires are set in place as long as the wire directly touches the positive and negative nodes of the calculator. For the lemon battery science project in the example images, the wires were soldered into place.
Step 3
Insert the metals. Push the nail into one side of the lemon. Be sure to leave enough of it above the lemon skin to attach a piece of wire. Push the hooked copper wire into the other side of the lemon. Again, make sure there is enough of the hooked end above the skin to attach copper wire to. Be sure the penny and the nail to do not touch. If they touch the lemon battery science experiment will not work.
Step 4
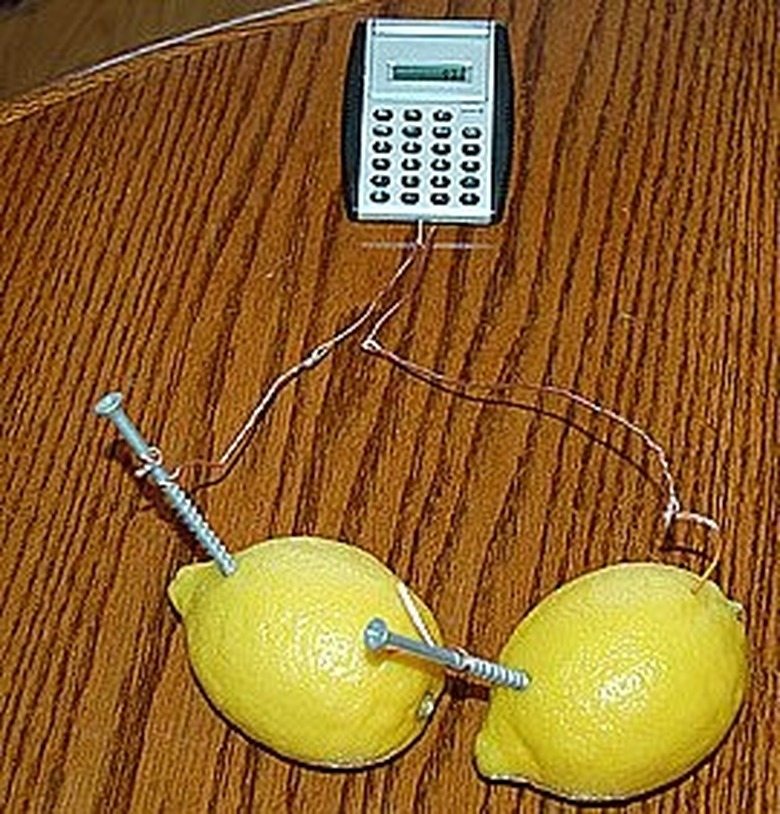
Hook up the calculator. Attach the ends of the copper wire you hooked up to the calculator to the copper hook and the galvanized nail in the lemon. Make sure to attach to the negative wire to the nail and the positive wire to the hook. This creates a single cell battery. It does not create enough power to run the calculator.
Step 5
Make it a multi-cell battery. More power is needed to run the calculator. To add another lemon battery cell, simply grab another lemon and repeat the process above by inserting another nail into the new lemon and hooking it to the copper hook of the original lemon. Add another copper hook to the other end of the lemon. Now reattach the wire from the positive section of the calculator to the final copper hook in the second lemon. A sufficient amount of power has been created to run the calculator.
Things Needed
- Fresh Lemons
- Galvanized Nail
- An old calculator
- Copper Wire
TL;DR (Too Long; Didn't Read)
2 lemon battery cells were sufficient to operate the calculator, while 4 cells created too much power for it. 14 gauge copper wire works best for the hooks.
Warning
Warn children that the lemon battery science project could produce a slight electrical shock, but nothing harmful.
Cite This Article
MLA
Contributor, . "How To Create A Lemon Battery Science Project To Power A Calculator" sciencing.com, https://www.sciencing.com/create-science-project-power-calculator-5058014/. 24 April 2017.
APA
Contributor, . (2017, April 24). How To Create A Lemon Battery Science Project To Power A Calculator. sciencing.com. Retrieved from https://www.sciencing.com/create-science-project-power-calculator-5058014/
Chicago
Contributor, . How To Create A Lemon Battery Science Project To Power A Calculator last modified August 30, 2022. https://www.sciencing.com/create-science-project-power-calculator-5058014/


