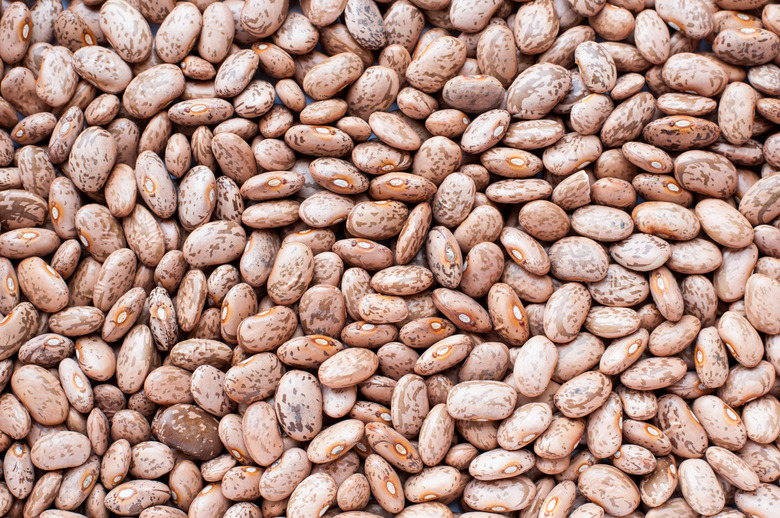
How To Grow Pinto Beans As A Science Project
When growing any kind of plant for a science project, valid results require growing many specimens of the same kind of plant and then repeating the experiment. Planting seeds to test a hypothesis is cheaper and may reduce the experiment time. Legumes like pinto beans work especially well for science projects.
Science and Science Fair Projects
Science and Science Fair Projects
A valid experiment tests only one variable at a time. Everything else in the project stays consistent. If the project is intended for a middle or high school science fair competition, the experiment should not have a known or researchable answer. Additional information about designing science fair projects can be found in the Resources.
Growing Pinto Beans
Growing Pinto Beans
Pinto beans belong to a group of plants called legumes. Legumes "fix" or return nitrogen from the air to the soil using nitrogen-fixing bacteria that exist in the soil.
Ideal conditions for pinto bean germination include well-drained sandy loam soil rather than clayey soil, warm soil (above 60 degrees Fahrenheit) and daytime temperatures between 80-90 F with night temperatures above 65 F. Pinto bean plants don't like wind, so windbreaks are recommended. Too much or too little water causes the flowers to drop. Beans prefer acidic soil with a pH between 5.8 and 6.5. Soil pH above 7.2 can cause chlorosis or yellowing of the leaves because of insufficient chlorophyll due to iron and/or zinc deficiencies.
According to Heirloom Organics, pinto beans should be planted with the "eye" or dark center spot pointing down. Also, pinto beans don't respond well to transplanting, so beans are planted directly into the soil.
Pinto Bean Plant Growth Projects
Pinto Bean Plant Growth Projects
Basic School Projects
Like many other seeds, pinto beans can be sprouted in plastic bags. Fold a paper towel to fit in the bottom of a plastic baggie so that the paper towel stands about 1-inch above the bottom of the bag. Space three staples just below the top of the paper towel. Add water to the baggie so the paper towel is damp but not dripping wet. Place a pinto bean on top of each staple. Try placing some beans with the eye up and others with the eye down. Close the top of the baggie, leaving just a tiny gap. Hang the baggie in a window. Open the top of the baggie a little more as the beans sprout. Add water if necessary to keep the towel damp. Younger students can draw or order pictures of the beans at different stages of germination. Older students can practice graphing using germinations over time.
Let elementary students ask their own questions and then design projects using pinto beans. Recycle foam egg cartons as cheap pots by separating the egg-holding side from the lid and using the lid as a drainage tray. Be sure to poke drainage holes in the egg spaces. Students can report their pinto bean plant project results using simple lab report formats that include tables and graphs.
Intermediate School Projects
Design a pinto bean plant growth project that compares an optimal growth condition against an alternate condition.
For example, optimum soil temperature for growing pinto beans is above 60 F. Plant two trays of beans using identical trays and soil, and then use ice packs or ice water under one tray to depress the soil temperature. Place under grow lights and monitor the rate of seed germination. For an alternate experiment, water beans using warm or cold water in one tray and room temperature water in the other tray.
Compare the rate of pinto bean germination in different types of soil. Study the characteristics of the soils (clay, silt, sand, humus) before planting the beans.
If time is not a factor, grow pinto beans to the flower stage and test the impact of soil moisture on flower development and retention. Have one set of beans receive consistent watering and one set of beans receiving less or more water. Use a soil moisture meter to monitor and record soil moisture.
Heirloom Organics also recommends not planting pinto beans near onion or fennel but doesn't explain why. Test this advice by planting pinto beans and onions or fennel in the same tray to compare to beans planted without the onions or fennel.
Advanced Project Ideas
Explore the nitrogen-fixing aspect of legumes like pinto beans. Naturally occurring Rhizobium phaseoli bacteria help legumes return nitrogen to the soil. One sign of these bacteria are nodes or swollen areas on the plant roots.
Carefully heat soil to kill any natural bacteria. Using two plant trays, plant pinto beans in the heat-treated soil. Add commercial Rhizobium phaseoli bacteria to one tray of seeds. Monitor and record seed germination and plant growth. Check for root nodes at the end of the experiment.
Or, investigate the natural population of nitrogen-fixing bacteria. Start by heat-treating half of the soil to be tested. Plant beans in the treated and untreated soil. Monitor seed germination and plant growth, checking all plants for root nodes at the end.
Soil pH also impacts pinto bean germination and growth. Use pH paper or a pH probe to determine the pH of the soil to be used. Adjust, if necessary, half of the soil to be within the optimal range and half of the soil to be less acidic to test for chlorosis. Explore different soil additives to correct chlorosis or compare the effectiveness of organic and inorganic additives in preventing or correcting chlorosis.
Cite This Article
MLA
Blaettler, Karen G. "How To Grow Pinto Beans As A Science Project" sciencing.com, https://www.sciencing.com/grow-pinto-beans-science-project-5395290/. 22 November 2019.
APA
Blaettler, Karen G. (2019, November 22). How To Grow Pinto Beans As A Science Project. sciencing.com. Retrieved from https://www.sciencing.com/grow-pinto-beans-science-project-5395290/
Chicago
Blaettler, Karen G. How To Grow Pinto Beans As A Science Project last modified August 30, 2022. https://www.sciencing.com/grow-pinto-beans-science-project-5395290/
