How To Make A Potato Battery
Do you like potatoes? You're not alone. People all over the world grow potatoes and turn them into French fries, potato salad, mashed potatoes and dozens of other tasty dishes. What they don't know, and what you may not have known until now, is that potatoes can also be an energy source. Israeli researchers have discovered that potato energy can light up a room for 20 hours or even charge a cell phone.
What? How is that possible? No one has ever gotten a shock from a potato. It doesn't even have negative and positive terminals, so how can it be a battery? It's the juices inside this starchy vegetable that make a potato battery. They are rich in phosphoric acid, they contain all kinds of dissolved salts, and sodium (Na+), potassium (K+) and chloride (Cl-) ions abound. These ions make potato juice an electrolyte, which is a fluid capable of conducting electricity. All you have to do is add a pair of electrodes. If you choose electrodes made of the right materials, one of them (the cathode) will produce free electrons, and the other (the anode) will attract them. This creates a charge difference, and when you connect the electrodes with a conducting wire, current will flow.
Don't worry. The current from a potato battery won't be enough to hurt you. If you touch the bare wire with your finger, you may feel a mild tingling. You can increase the voltage by wiring together several of these potato batteries, and ultimately you can generate enough to light an LED, which will stay lit until the potato juice gets used up. That could take almost a day.
How to Construct a Potato Battery
How to Construct a Potato Battery
You'll probably find everything you need to make a potato battery around the house. If not, you can find what you need at any hardware store.
Things Needed
- Zinc-galvanized nail
- Copper nail OR short length of 10- or 12-gauge copper wire OR a penny
- Multimeter with alligator-clip leads
1. Prepare the Potato
Potatoes are usually cleaned before they come to the store, but they often have residual dirt. Scrub this off with water and dry off the potato with a towel. This removes the possibility of impurities interfering with your potato science project. If you have a large potato, you might consider cutting it in half. Half a potato works as well as a whole one, and you can set it flat on the table so it doesn't roll around.
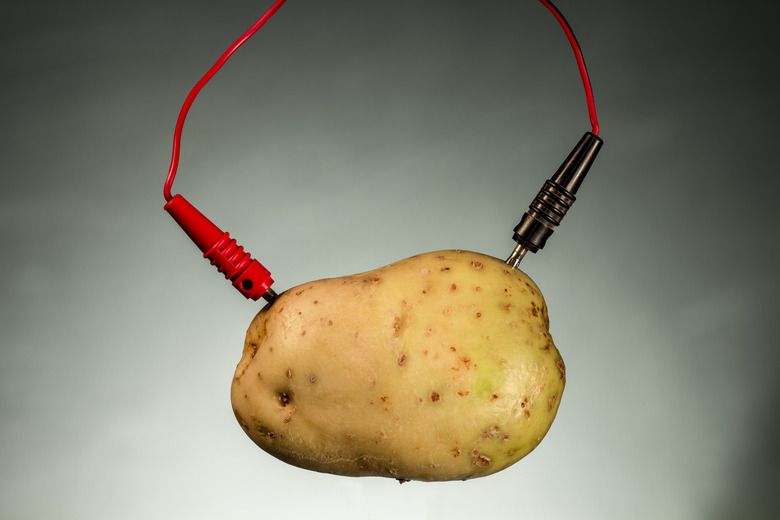
2. Insert the Electrodes
Push the zinc nail into the potato near one end. It should penetrate about halfway into the core. Insert the copper electrode to the same depth as close to the opposite end of the potato as possible. (If you've cut your potato in half, place the electrode and nail on opposite sides of the upright half.) The two electrodes should not be touching each other. In fact, the greater the distance between the electrodes, the better the battery will work. If you use a penny as your copper electrode, you may have to make a small cut in the potato skin with a knife to create a slot for it.
3. Connect the Meter
Set the meter to read volts in the 2-volt range. Connect the positive (red) lead to the copper electrode, which is the anode, and the negative (black) lead to the zinc electrode, which is the cathode. Check the meter, and voilà! You'll note a positive reading of about 0.5 volts.
Increasing the Voltage
Increasing the Voltage
If you disconnect the leads from the meter and connect them to an LED, it probably won't light. An LED needs at least 1.5 volts and 10 milliamps of current, and the potato battery supplies only about 0.5 volts. However, remember that you can increase voltage by connecting batteries in series. You can probably get enough voltage from three potatoes to illuminate an LED.
Prepare two more potato batteries, and then use wires with alligator clips to connect them together. Attach one lead of one wire to the anode on the first potato and the other lead to the cathode on the second. Attach one lead of a second wire to the anode on the second potato and the other lead to the cathode on the third potato. This leaves you a free cathode (on the first potato) and a free anode (on the third potato). Connect the meter to these electrodes, and you should get a reading of at least 1.5 volts. Now disconnect the meter and connect the LED, and it should shine dimly.
You could keep increasing the voltage by adding more batteries, but you actually need more current to make the LED shine brighter. You increase current by wiring batteries in parallel.
Increasing the Current
Increasing the Current
To construct a battery bank that supplies the same voltage but double the current, you'll need three more potato batteries and six more connection wires. Separate the potatoes into three pairs and connect each pair in parallel by joining anodes with one wire and their cathodes with another wire. Now wire the three pairs together in series by connecting an anode of one pair to the cathode of a second pair and an anode of that pair to a cathode of the third. Connect leads to a cathode of the first pair and an anode of the third and touch the leads to the LED. It should burn much more brightly.
This setup should provide enough electricity to power a digital clock. If not, your potato clock battery bank may need one or two more pairs of potatoes.
Using Veggie Power to Light the World
Using Veggie Power to Light the World
Many rural communities worldwide are too far from a power grid to have electricity. In an effort to to supply light for these communities, a team headed by Haim Rabinowitch of the Hebrew University of Jerusalem constructed a device that works with slices of potatoes. The team found something very interesting. Boiling a potato for eight minutes actually increases its electrical capacity. Boiling ruptures the cell membranes inside the potatoes and enhances the electrolytes by making more ions available. They found that boiling increases the electric flow by a factor of 10, which is a significant difference.
Using a single slice of boiled potato, the Israeli research team constructed a battery that powered an LED for up to 20 hours. When the LED went out, they simply inserted a fresh slice of boiled potato to get an additional 20 hours of light.
Potatoes aren't the only fruit or veggies that can do this. Lemons, oranges, apples, strawberries and bananas all have electrolytic juices, and some of these – especially lemons – work even better than potatoes. The problems with most fruits and veggies are twofold: They aren't as hard as potatoes, and they attract insects. Potatoes have one more advantage. As the world's fourth most abundant food crop, they are available all over the world.
Rabinowitch and his team created a potato battery kit that comes with all you need to create electricity. Simply add potatoes. The cost of the electricity you generate this way is about $9 per kilowatt hour. That compares favorably to the power from a D-cell battery, which costs about $84 per kilowatt hour.
Cite This Article
MLA
Deziel, Chris. "How To Make A Potato Battery" sciencing.com, https://www.sciencing.com/make-potato-battery-6537882/. 26 November 2018.
APA
Deziel, Chris. (2018, November 26). How To Make A Potato Battery. sciencing.com. Retrieved from https://www.sciencing.com/make-potato-battery-6537882/
Chicago
Deziel, Chris. How To Make A Potato Battery last modified March 24, 2022. https://www.sciencing.com/make-potato-battery-6537882/