How To Make A Robotic Arm
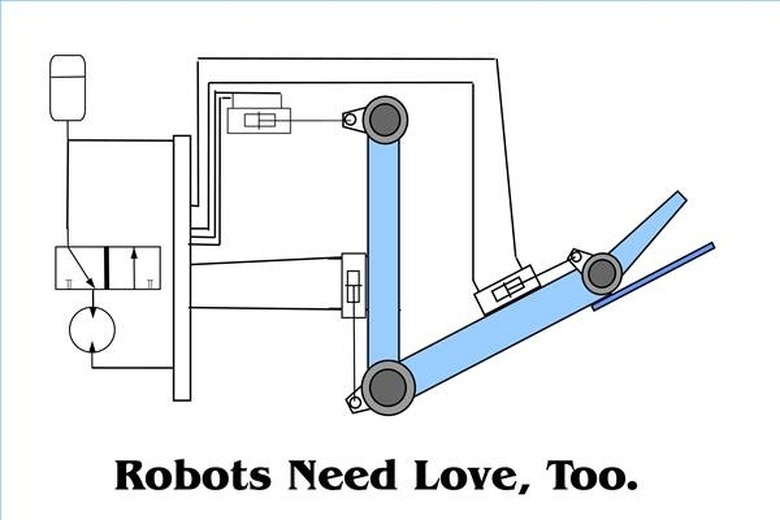
When you consider how the human arm actually works, the robot arm is almost simple by comparison. Both systems use a frame, which may or may not be movable. One is chemically motivated, the other is either hydraulic or electrical or an electrohydraulic hybrid. Both use "push/pull" leverage against a frame to move the arm and open or close the manipulator/hand at the end.
Step 1
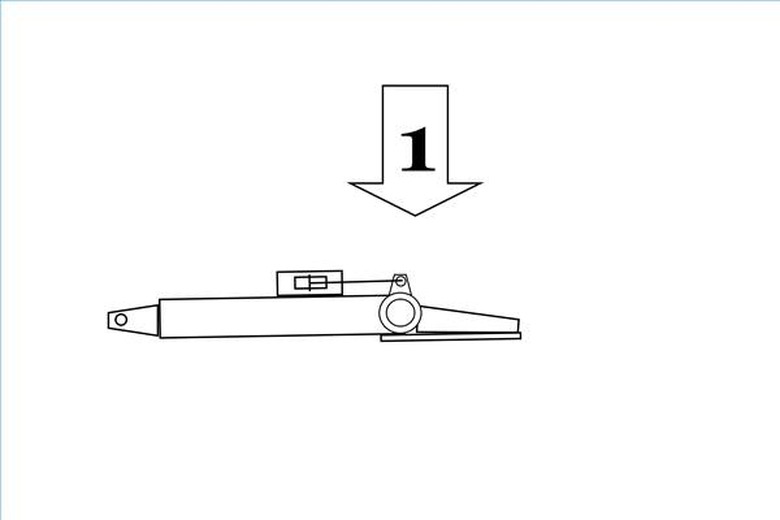
Weld the manipulator (stator) to the bottom of the end of the aluminum "forearm" beam that does not have a ram attachment link. Weld a robotic hinge joint to the end of the forearm beam and the stator. Weld the trapezoidal (mobile) block of aluminum to the robotic hinge joint, so that the ram attachment link is on top. Close the hinge, so that the stator and mobile parts of the manipulator are closed.
Step 2
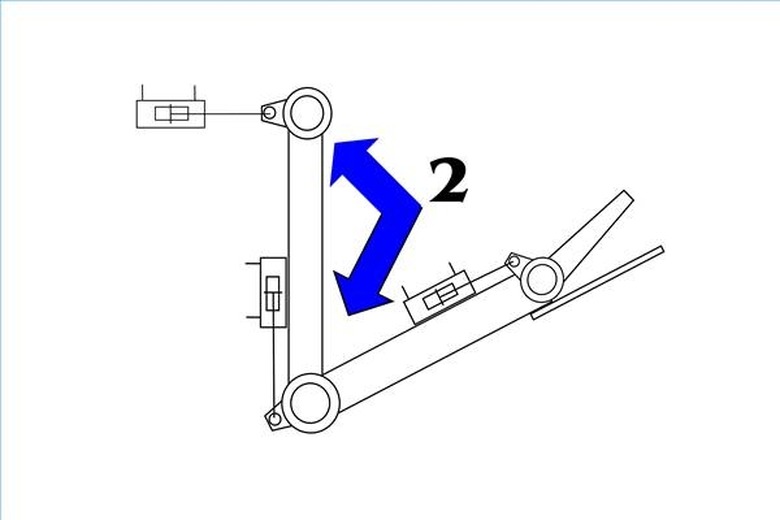
Weld the upper and lower "arms" to a hinge, to form the "elbow." Weld a hinge to the upper end of the upper arm and to the external "shoulder" support.
Step 3
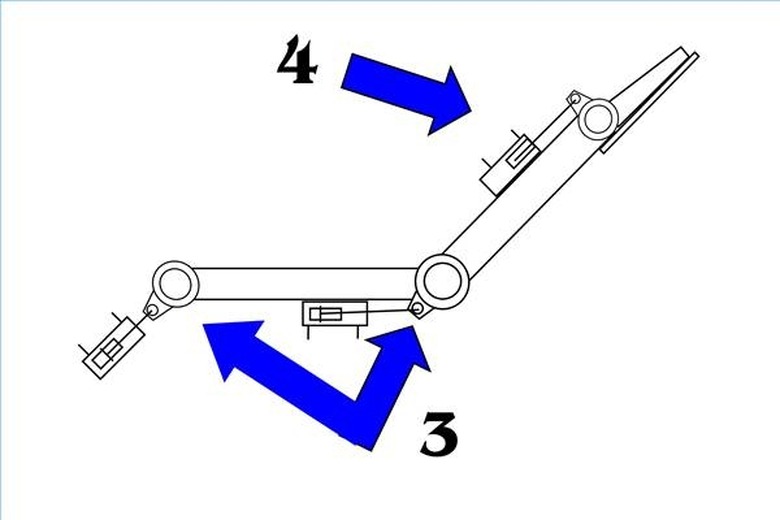
Attach the piston of a hydraulic ram to the attachment link on the mobile part of the manipulator. With the piston of the ram at full extension, weld the ram to the forearm beam.
Step 4
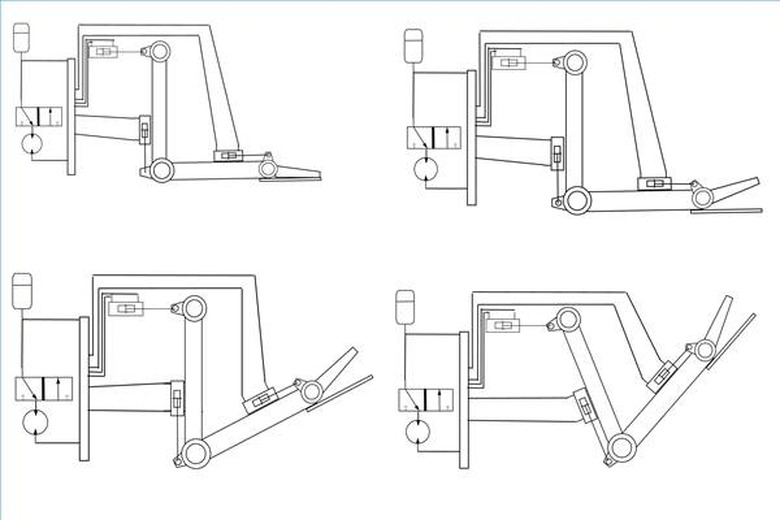
Attach the pistons of the hydraulic ram to the attachment links on the aluminum beams that form the upper arm and forearm. With the forearm at full extension and the piston of the associated ram at full compression, weld the forearm ram to the the upper arm. With the upper arm at full extension and the piston of the associated ram at full compression, weld the upper arm ram to the external "shoulder" support system.
Step 5
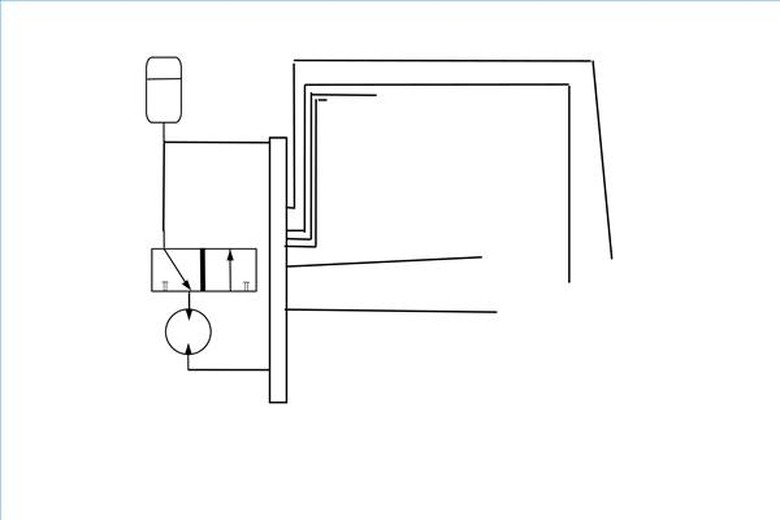
Attach the hoses from the hydraulic rams to the appropriate ports on the hydraulic manifold. Attach the bidirectional hydraulic motor to the manifold. Attach the hydraulic reservoir to the manifold. Attach the hydraulic reservoir to the control valve and the control valve to the motor.
Step 6
Set the switch of the control valve to the closed position. Charge the system with hydraulic fluid until the fluid reaches the proper level in the reservoir. To open the manipulator, open the valve to make the ram compress; as the piston moves backward in the ram it pulls upward on the mobile side of the manipulator, opening the "hand." To close the manipulator, extend the piston fully. The piston will push forward on the mobile portion of the manipulator and close the hand.
Things Needed
- Aluminum "I" beams with ram attachment links
- Robotic hinge joints (unidirectional, up/down only)
- Flat sheet of aluminum (manipulator-stator)
- Trapezoidal block of aluminum with ram attachment link (manipulator-mobile)
- Hydraulic rams, bidirectional, cushioned
- Hydraulic control valve
- Hydraulic motor, bidirectional
- Hydraulic reservoir
- Hydraulic manifold
- Variety of hoses
- External "shoulder" support
TL;DR (Too Long; Didn't Read)
The direction in which you move the piston controls the movement of the component. Think of your arm as the piston and the door to your room as the robotic arm. When you push on a door it moves on its hinges and closes. When you pull on the door knob, it moves on its hinges and opens.
Warning
Hydraulic systems can be very dangerous and appropriate caution is urged.
Cite This Article
MLA
, Will Charpentier. "How To Make A Robotic Arm" sciencing.com, https://www.sciencing.com/make-robotic-arm-5262443/. 24 April 2017.
APA
, Will Charpentier. (2017, April 24). How To Make A Robotic Arm. sciencing.com. Retrieved from https://www.sciencing.com/make-robotic-arm-5262443/
Chicago
, Will Charpentier. How To Make A Robotic Arm last modified March 24, 2022. https://www.sciencing.com/make-robotic-arm-5262443/
