How To Make A Sphinx For School
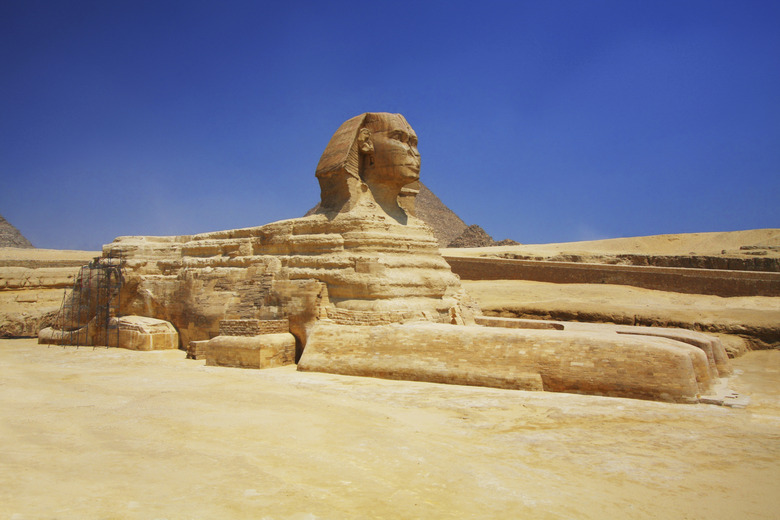
You have probably seen pictures of that strange, reclining stone figure with the face of a human and the body of a lion resting near the pyramids of Egypt. That figure is known as the sphinx, but it is actually not the only one of its kind. The word "sphinx" refers to any mythological creature with the head of a human or other animal and the body of a lion and many statues of such creatures were made in ancient times. You can make one fairly easily yourself for a school project.
Step 1
Glue the plastic foam block to the center of the cardboard square. Allow it to dry. Take the clay out of the tub and knead it thoroughly for about two minutes to make it very pliable. Divide the clay in half. Take half of the clay and press it down, just as you would cookie dough, into a circular disk a little less than 1/2-inch thick. Lay this disk over the plastic foam block and press it firmly to adhere it to the block. Use your hands to smooth out the clay and round the edges. Add more clay if necessary to cover patches and to give the figure the look of a long loaf of bread. This is the sphinx body.
Step 2
Divide the remaining clay in half. Take one of the halves and separate it into four equal, smaller lumps. Roll each lump into a log shape about 1.5 inches in diameter. Round the ends of these logs so that they appear like fat sausages. Attach the four logs to the sides of the body of the sphinx, with two toward the front and two near the back, like the legs of an animal lying on its stomach.
Step 3
Use the remaining clay to form a large round ball. Attach the ball to the top of the clay figure to make a sphinx head. Shape the clay to resemble your head or that of a friend, a pet or whatever you want.
Step 4
Add details to enhance the look of the sphinx. Use a picture like the one in this article as your guide. Shape the legs so that they look more like those of a resting animal. Use the butter knife to cut small, vertical slits into the ends of the legs and shape them into paws. Use the butter knife to cut eyes into the face. If desired, take some excess clay and make a tail to go on the back end and claws to go on the paws. Also, you can use the butter knife to press small details into the clay, like a brick pattern or your own fake hieroglyphics.
Step 5
Spread the glue from the remaining bottles over the entire surface of the sphinx and cardboard. Immediately sprinkle the playground sand over the entire model and the cardboard. Put a thick layer of sand on the cardboard. If desired, leave the sand off of the sphinx entirely or just lightly sprinkle sand on it.
Things Needed
- Cardboard, 1 square foot
- White glue, 2 bottles
- Brick-sized plastic foam block
- Brown modeling clay
- Playground sand, 2 cups
- Butter knife
TL;DR (Too Long; Didn't Read)
If you cannot find brown clay, then just mash together equal, fist-sized clumps of blue, yellow and red clay. As you mash it together, it will become an even brown tone.
References
Cite This Article
MLA
Cato, Jeremy. "How To Make A Sphinx For School" sciencing.com, https://www.sciencing.com/make-sphinx-school-6102178/. 24 April 2017.
APA
Cato, Jeremy. (2017, April 24). How To Make A Sphinx For School. sciencing.com. Retrieved from https://www.sciencing.com/make-sphinx-school-6102178/
Chicago
Cato, Jeremy. How To Make A Sphinx For School last modified March 24, 2022. https://www.sciencing.com/make-sphinx-school-6102178/
