How To Read Milliamps With A Digital Meter
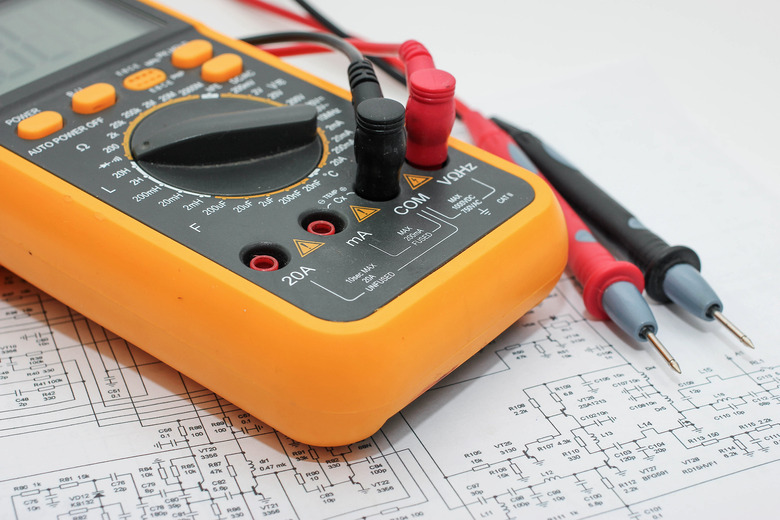
You use digital multimeters to find out the current, voltage and resistance in an electrical circuit, and they are must-have devices for anyone who is getting into electronics. Current is measured in amps, and one-thousandth of an amp is called a milliamp. Multimeters can function as ammeters (measurers of current), and you can use the meter to read the number of milliamps flowing through a circuit. This process usually requires connecting the probes to the appropriate ports, breaking the circuit so the current can flow to the multimeter, choosing a suitable setting on the meter, and then connecting the probes to the circuit.
TL;DR (Too Long; Didn't Read)
Connect the black jack to the multimeter port labeled "COM," connect the red one to the port with either "A" or "mA" on it, and then select an appropriate maximum current on the main dial. Turn off the circuit you intend to measure, make a break in it, and then touch the probes to the wires or components at both sides of the break. Now switch the current back on to read the number of milliamps going through the circuit.
What Is a Digital Multimeter?
What Is a Digital Multimeter?
A multimeter measures the key electronic characteristics of a circuit: voltage, current and resistance. Two points at different locations on a circuit have a difference in electrical potential between them, which is described as the voltage difference or just voltage between the points. The voltage "pushes" the current around the circuit, and the current describes the flow of electricity around the circuit. So a higher current means more electricity flows past a given point per second, in the same way as a higher current of water means more water passes a point each second. The resistance describes how difficult it is for current to flow through the circuit. For the same voltage, a higher resistance means less current flow.
Multimeters use the relationship between these quantities described by Ohm's law to measure them for any circuit. The name "multimeter" refers to the multiple functions of the same device. Voltmeters, ammeters and ohmmeters are single-function devices for measuring voltage, current and resistance, respectively. Analog multimeters exist but are more difficult to use than the more common digital devices, which usually feature clear display screens. You use two probes to measure parts of the circuit, ports to insert the probes, and usually a dial or a selection of buttons to choose the mode.
SI Prefixes and Units
SI Prefixes and Units
Multimeters return a result in SI (the standard scientific) units for voltage, current and resistance, which are volts (V), amps (A) and ohms (Ω), respectively. This gives you most of the information you need to interpret the reading, but multimeters also use standard prefixes for important fractions and multiples of these quantities.
The prefix "micro" means one-millionth and has the symbol μ. This means 400 μV is 400-millionths of a volt or 400 microvolts.
The prefix "milli" refers to one-thousandth and has the symbol m. So 35 mA is 35 milliamps or 35-thousandths of an amp.
"Kilo" refers to thousands and has the symbol k. So 50 kΩ is 50 thousand ohms or 50 kiloohms.
The "mega" prefix means millions, and scientists use a capital M for this. So 1 MΩ is 1 megaohm or 1 million ohms.
Reading Milliamps With a Digital Multimeter
Reading Milliamps With a Digital Multimeter
The process for reading current on a digital multimeter depends on your specific multimeter, but it is similar across most devices. Turn on the meter and insert the probes into the appropriate spots. The jack from the black lead goes into the port labeled "COM," and the red jack goes into the appropriate port for the level of current you're expecting. Many multimeters have an mA (milliamp) port, which in some cases is combined with the voltage and ohm port, and also have a 10 A or 20 A port for higher current. If you're reading a low current in milliamps – below the number of milliamps listed beside the port, often 200 mA – insert the red lead into the port labeled "mA."
Use the main selector switch to specify that you're measuring a current and choose an appropriate setting. The settings give you a maximum for the range of current you're expecting, but it's best to choose one that is too high at first – 10 A, for example – and then reduce it as needed for a more precise result.
Turn off the circuit you are measuring and make a break in it at an appropriate point. You need to break the circuit so that all of the current goes to the meter. Touch the probes to the two points where you've broken the circuit and switch the circuit back on. The current flows through the multimeter, which displays the current. Ensure that the current is in the range of mA expected and then lower the setting of your multimeter to the next-highest option – for a 0.05 A or 50 mA current, choose 200 mA – to get a precise reading in milliamps.
Cite This Article
MLA
Johnson, Lee. "How To Read Milliamps With A Digital Meter" sciencing.com, https://www.sciencing.com/read-milliamps-digital-meter-8582325/. 13 April 2018.
APA
Johnson, Lee. (2018, April 13). How To Read Milliamps With A Digital Meter. sciencing.com. Retrieved from https://www.sciencing.com/read-milliamps-digital-meter-8582325/
Chicago
Johnson, Lee. How To Read Milliamps With A Digital Meter last modified March 24, 2022. https://www.sciencing.com/read-milliamps-digital-meter-8582325/
