Soldering & Desoldering Techniques
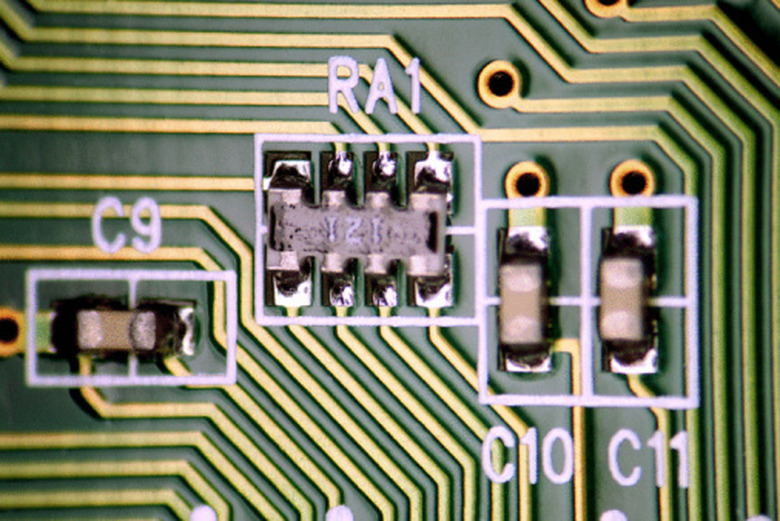
A typical printed circuit board, or PCB, contains a large number of electronic components. These components are held on the board by solder flux that creates a strong bond between the pins of a component and their corresponding pads on the board. However, the main purpose of this solder is to provide electrical connectivity. Soldering and desoldering is performed to install a component on a PCB or to remove it from the board.
Soldering with Soldering Iron
A soldering iron is the most commonly used tool to solder components on PCBs. Generally, the iron is heated to a temperature of about 420 degrees Celsius, which is enough to quickly melt the solder flux. The component is then positioned on the PCB such that its pins are aligned with their corresponding pads on the board. In the next step, the solder wire is brought into contact with the interface between the first pin and its pad. Briefly touching this wire at the interface with the heated soldering iron tip melts the solder. The molten solder flows on the pad and covers the component pin. After solidifying, it creates a strong bond between the pin and the pad. Since the solidification of the solder happens fairly quickly, within two to three seconds, one can move to the next pin immediately after soldering one.
Reflow Soldering
Reflow soldering is generally used in PCB production environments in which large numbers of SMD components need to be soldered at the same time. SMD stands for surface mount device and refers to electronic components that are much smaller in size than their through-hole counterparts. These components are soldered on the component side of the board and do not require drilling. The heat-oven method of soldering requires a specially designed oven. The SMD components are first placed on the board with a solder flux paste spread over all of its terminals. The paste is sticky enough to keep the components in place until placing the board in the oven. Most reflow ovens operate in four stages. In the first stage, the temperature of the oven is raised slowly, at a rate of about 2 degrees Celsius per second to about 200 degrees Celsius. In the next stage, which lasts for about one to two minutes, the temperature increment rate is significantly lowered. During this stage, the flux starts to react with the lead and the pad to form bonds. The temperature is further raised in the next stage to about 220 degrees Celsius to complete the melting and bonding process. This stage generally takes less than a minute to complete, after which the cooling stage begins. During cooling, the temperature is rapidly decreased to a little above room temperature, which helps in quick solidification of the solder flux.
Desoldering with Copper Braid
Copper braid is commonly used to desolder electronic components. This technique involves melting the solder flux and then allowing the copper braid to absorb it. The braid is placed on the solid solder and gently pressed with a heated soldering iron tip. The tip melts the solder, which is quickly absorbed by the braid. This is an efficient but slow method of desoldering components since each soldered joint must be worked on individually.
Desoldering with Solder Sucker
Solder sucker is basically a small tube connected to a vacuum pump. Its purpose is to suck the molten flux off of pads. A heated soldering iron tip is first placed on the solid solder until it melts. The solder sucker is then placed directly on the molten flux and a button on its side is pushed that quickly sucks the flux.
Desoldering with Heat Gun
Desoldering with a heat gun is generally used to desolder SMD components, though it can also be employed for through-hole components. In this method, the board is placed on a perfectly flat place and a heat gun is pointed directly at the components to be desoldered for a few seconds. This quickly melts the solder and on the pads, loosening the components. They are then immediately lifted with the help of tweezers. The downside of this method is that it is very difficult to use for small, individual components since the heat can melt the solder on nearby pads, which can dislodge components that are not be desoldered. Also, the molten flux can flow to nearby traces and pads, causing electrical shorts. It is therefore very important to keep the board as flat as possible during this process.
Cite This Article
MLA
Ahmed, Naeem. "Soldering & Desoldering Techniques" sciencing.com, https://www.sciencing.com/soldering-desoldering-techniques-8288017/. 24 April 2017.
APA
Ahmed, Naeem. (2017, April 24). Soldering & Desoldering Techniques. sciencing.com. Retrieved from https://www.sciencing.com/soldering-desoldering-techniques-8288017/
Chicago
Ahmed, Naeem. Soldering & Desoldering Techniques last modified March 24, 2022. https://www.sciencing.com/soldering-desoldering-techniques-8288017/
